




Custom Polyurethane Parts for Bus & Light Rail Articulation Systems: Solving Capacity, Anti-Slip Texture, and Mold Maintenance
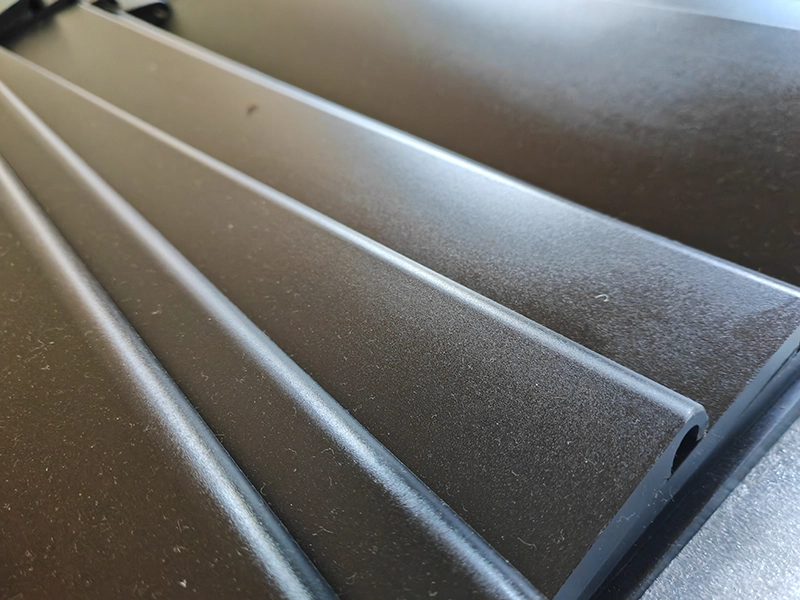
A customer supplying articulation systems for new energy electric buses and light rail vehicles came to us with a custom molded polyurethane parts and strips project.
The part itself was not particularly complicated in geometry. The difficult part was keeping the manufacturing process under control as the project moved from lower-volume production to higher-volume production.
We eventually had to deal with three separate issues.
First, the original manual molding process was too slow for the customer’s increasing demand. Second, the smooth surface of the part was no longer suitable for the application and had to be changed to a rougher, anti-slip finish. Third, after the mold had been used repeatedly, oil and residue accumulated on the mold surface and the textured finish of the molded parts began to lose consistency.
We did not solve all three problems by changing the polyurethane material. Most of the work was done around the production process and the mold.
The Original Production Process Could Not Keep Up With Demand
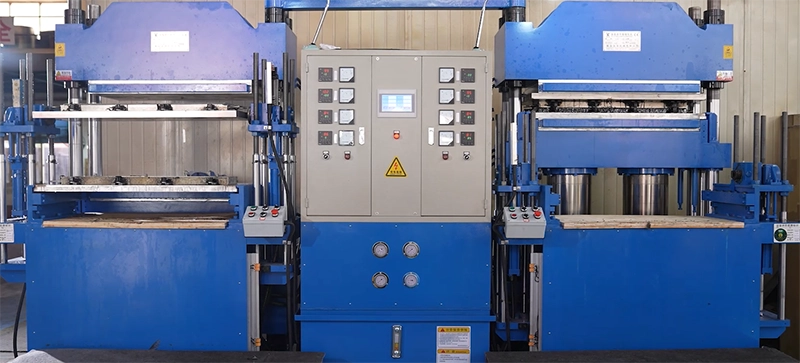
We originally produced the polyurethane part using a traditional manually operated flat-plate vulcanizing press.
That process worked when the production requirement was relatively small. There was no reason to build a more complicated system just to make a limited number of parts.
The situation changed when the customer’s demand increased.
At that point, the issue was no longer whether we could make the part. We could. The problem was how to maintain enough output without making the production process increasingly dependent on manual labor.
With this type of process, the operator has to be involved in repeated loading, handling and molding operations. As the quantity goes up, those repetitive steps start to consume a large amount of production time.
Adding more people would have increased capacity to some extent, but it would not have solved the underlying problem.
So we looked at the process itself.
We Developed a Semi-Automatic Molding Machine for the Part
Our solution was to redesign the production method and build a semi-automatic molding machine around the requirements of this polyurethane part.
We did not start with a standard piece of automation equipment and force the part to fit it. We looked at the actual production sequence and decided which operations could be handled mechanically and which still needed operator involvement.
That gave us a much more practical production arrangement.
The operator still remained involved, but repetitive machine-handling work was reduced. The molding process also became easier to repeat from one cycle to the next.
This made a noticeable difference to production efficiency and gave us more flexibility as the customer’s order volume increased.
This is something I pay close attention to when discussing custom cast urethane parts and projects.
A sample can be made successfully with a very simple process. That does not mean the same process is appropriate for long-term production.
For a B2B customer, the real question is not only:
“Can you make the part?”
It is also:
“Can you keep making the part when the monthly demand becomes much higher?”
That is where production equipment and process design begin to matter.
The Customer Later Needed a Rougher Surface
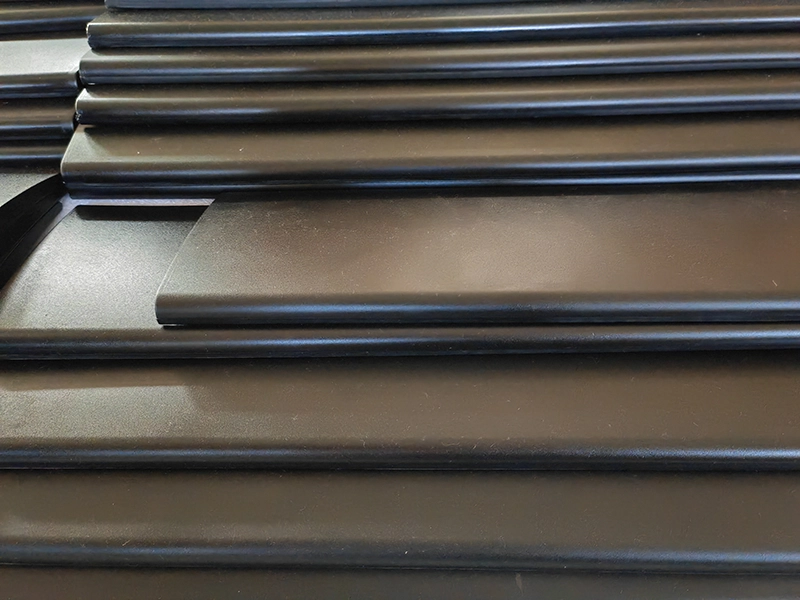
The original part had a smooth surface.
During actual use, the customer found that a rougher surface was needed to reduce the possibility of slipping. This changed an appearance requirement into a functional surface requirement.
We considered how to make the surface rougher and, more importantly, how to make the result repeatable.
One option would have been to mold the part with a smooth surface and then roughen the finished polyurethane part in a secondary operation.
We did not choose that route.
Instead, we worked on the mold surface.
Creating the Texture Directly on the Mold
The approach was to create a rough texture on the mold surface and allow the polyurethane to reproduce that texture during molding.
This sounds straightforward until the part has to be produced repeatedly.
A mold surface is not a printed pattern. It has to survive repeated contact with the molding process and continue to transfer the required texture to the polyurethane.
We therefore had to look at the texture itself as part of the tooling process.
The important point here is that the surface of a custom molded polyurethane part is affected by more than the polyurethane formulation.
Two parts made from the same material can have different surface appearances if the mold condition is different.
For this project, the mold became an important part of the surface engineering.
Repeated Molding Created Another Problem
Once the textured mold had been put into production, another issue gradually appeared.
The mold was being used over and over again, and oil, release residues and other contamination began to build up on the surface.
At first this was mainly a tooling-maintenance problem.
Later it became a product-quality problem.
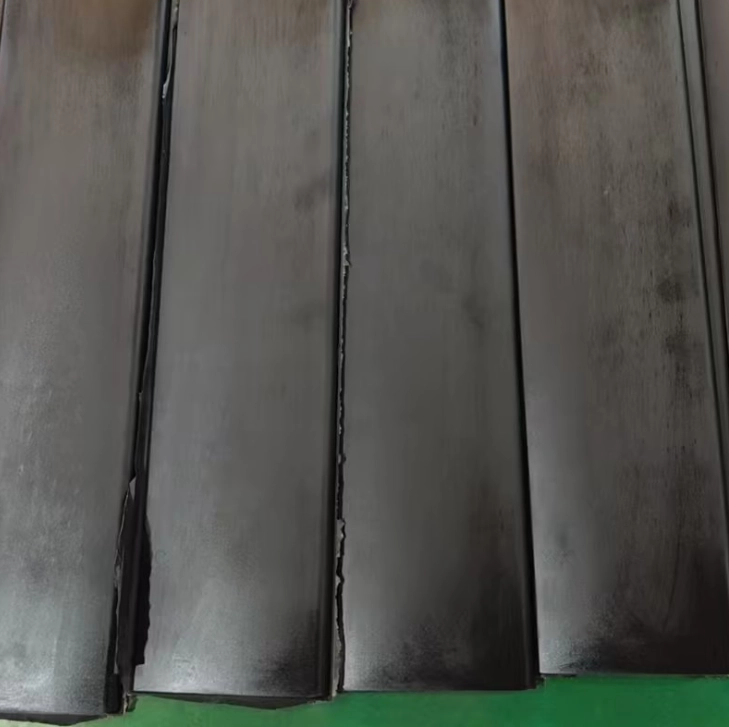
The contamination affected the way the texture was transferred from the mold to the polyurethane. As the mold condition changed, the molded surface became less uniform.
Some areas no longer had the same matte appearance as before. The overall finish was not as consistent, and the visual difference became easy to notice.
This was especially frustrating because the rough surface had been introduced for a practical reason in the first place.
We had solved the texture problem, but now we had to find a way to keep the mold in the right condition.
Why Aggressive Mold Cleaning Was Not the Right Answer
The obvious reaction to a dirty mold is to clean it more aggressively.
That is not always a good idea when the mold itself has a controlled surface texture.
The texture is part of the tooling, and we did not want a cleaning method that removed the contamination while also changing the mold surface.
So we were looking for a method that could do three things at the same time:
- Remove oil and residue efficiently.
- Keep the mold surface in good condition.
- Be practical enough to use during ongoing production.
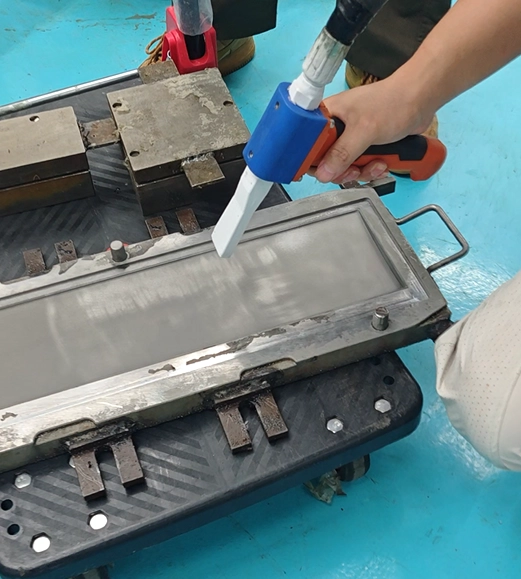
We tested and evaluated different approaches and eventually settled on a more controlled cleaning method for this application.
The goal was not to make the mold look perfect for a photograph.
The goal was to restore the working condition of the mold without unnecessarily affecting the textured surface.
That distinction made a difference.
After improving the cleaning process, the mold could be maintained more effectively and the textured appearance of the polyurethane part remained more consistent during continued production.
Mold Maintenance Became Part of the Production Process
Before the surface was textured, mold cleaning was not such a critical issue for this part.
After the texture became part of the finished product requirement, mold condition became directly connected to product quality.
We therefore stopped treating cleaning as something that was only done when the mold became visibly dirty.
Instead, we paid closer attention to the condition of the mold during production.
The practical process became:
Molding → inspection → check mold condition → clean when required → continue production
It is a small change in the production mindset, but it matters when the mold surface is responsible for creating a functional finish.
A textured polyurethane part should not be judged only by the material specification. The condition of the tooling also needs to be considered.
What Changed in the Project
Looking back at the project, there were three different problems and three different solutions.
| Problem | What We Found | What We Changed |
|---|---|---|
| Production capacity | The manual molding process became too slow as demand increased | Developed a semi-automatic molding machine |
| Surface requirement | The original smooth surface was not suitable for the customer’s later requirement | Created a rough texture on the mold surface |
| Surface inconsistency | Oil and residue accumulated on the mold after repeated production | Improved the mold-cleaning and maintenance process |
None of these changes came from simply selecting a different polyurethane.
The material was only one part of the system.
What a Buyer Should Tell a Custom Polyurethane Manufacturer
For this type of project, I prefer to receive as much information as possible before production starts.
A drawing is important, but it does not always explain the whole problem.
For example, a drawing may show the dimensions but say very little about why the surface needs to be rough, how the part is installed, how much movement it sees or how many parts will be required every month.
For a quotation or technical review, the following information is useful:
| Item | Information |
|---|---|
| Drawing or sample | Part geometry and reference dimensions |
| Material | Required polyurethane type or performance requirement |
| Hardness | Shore hardness target, when specified |
| Surface | Smooth, matte, rough or textured |
| Application | Polyurethane pars for automobile, articulation system, paitning, or installation location |
| Operating conditions | Temperature, load, movement and environmental exposure |
| Quantity | Prototype quantity, batch size and annual demand |
| Quality requirements | Critical dimensions, appearance and surface requirements |
| Tooling | Existing mold or new tooling requirement |
The annual quantity is particularly important.
A process that makes sense for 100 pieces is not automatically the best process for 10,000 pieces.
The same applies to tooling.
If the surface finish is critical, the mold design and maintenance method should be discussed before production starts rather than after the first quality problem appears.
What Design Engineers Should Consider
For design engineers, the most useful discussions often happen before the mold is finished.
If a surface has a functional purpose, that should be clear from the beginning.
The same applies to critical dimensions and tolerances. Not every dimension on a polyurethane component needs the same level of control, and it helps to identify which features actually affect assembly or performance.
For a custom polyurethane part, we normally pay attention to:
- Overall geometry
- Critical dimensions and tolerances
- Surface texture
- Parting line location
- Demolding considerations
- Expected deformation or movement
- Operating temperature
- Contact conditions
- Expected production volume
These details can influence both the material choice and the molding process.
What Quality Engineers Should Watch During Production
For quality engineers, final inspection is only part of the picture.
If the appearance of the part depends on the mold surface, then the mold itself becomes part of the quality-control system.
Depending on the specification, the inspection process may include dimensional checks, hardness checks, visual inspection and surface consistency.
For a textured part, the question is not simply whether one sample looks correct.
The more useful question is whether the surface continues to look and perform consistently throughout the production run.
That is why mold condition deserves attention when the surface texture is important to the application.
How We Control Quality in Custom Cast Molded Polyurethane Products Manufacturing?
What We Learned From This Project
The biggest lesson was not about a particular polyurethane grade.
It was about process control.
The customer’s requirements changed as the project developed.
The original production method was acceptable at one volume but became inefficient at a higher volume.
The original smooth surface was acceptable initially but later needed to be changed.
The textured mold solved the surface requirement, but repeated production then created a mold-maintenance problem.
Each new issue came from actual production.
That is normal in custom manufacturing.
A drawing may define the part, but it does not always reveal everything that will happen after thousands of molding cycles.
From our side, the job is to keep looking at the actual cause of the problem.
If production is too slow, look at the process.
If the surface is wrong, look at both the material and the tooling.
If the surface changes after repeated production, look at the mold condition as well.
That approach is often more useful than changing the material every time something goes wrong.
Custom Polyurethane Components for Transportation Applications
We work with customers on custom polyurethane components where the part geometry, surface, hardness and production requirements need to be developed around the application.
For projects involving transportation equipment, industrial machinery or other custom assemblies, we normally review the drawing or sample together with the operating requirements and expected production volume.
The manufacturing route may involve cast polyurethane, compression molding or other molding methods depending on the geometry and production requirement.
The important thing is to choose the process around the actual part rather than forcing every project into the same production method.
For this articulation-system project, the final result came from three practical changes:
- A more efficient molding process.
- A textured mold surface.
- A better way to maintain that mold surface during repeated production.
That is also how we approach many of our custom polyurethane projects.
The objective is not just to make a sample that looks right on one day.
The objective is to build a process that continues to produce the required part after production starts.
Frequently Asked Questions
Can you manufacture custom polyurethane parts for articulated buses and light rail vehicles?
Yes. We can develop molded polyurethane parts from customer drawings, samples or application requirements. The material, hardness, geometry and molding process are selected according to the actual application.
Can a polyurethane part be molded with an anti-slip rough surface?
Yes. A textured mold surface can be used to transfer a rougher finish to the molded polyurethane part. The exact texture and manufacturing method depend on the customer’s requirements.
Why does the surface finish change after repeated molding cycles?
One possible cause is the condition of the mold. Oil, release residue and other contamination can build up on the mold surface and affect the transfer of the intended texture.
How do you clean a textured mold without damaging it?
The cleaning method needs to remove contamination without unnecessarily wearing or changing the textured mold surface. The appropriate method depends on the tooling material, surface texture and type of contamination.
What information is needed for a custom polyurethane part quotation?
A drawing or sample is the best starting point. It is also useful to provide hardness, surface requirements, application conditions, critical tolerances, expected quantity and any specific inspection requirements.
Does production volume affect the molding method?
It can. A manual molding process may be practical for small quantities but less efficient for larger recurring orders. At higher volumes, the molding equipment, tooling and handling process may need to be reviewed.
Need a Custom Polyurethane Part for an Articulation System?
If you are sourcing custom polyurethane parts for articulated buses, light rail vehicles or similar transportation applications, send us your drawing, sample or application details.
Useful information includes:
- Part drawing or sample
- Hardness target (Choose the Right Hardness to Double Lifespan of Equipment)
- Surface requirement
- Operating conditions
- Critical dimensions
- Annual volume
We will review the part as a manufacturing project, not just a material quotation.